1. MOUNT YOUR NETWORK VOLUME where you want to store the backup bundle, and you have write rights to.
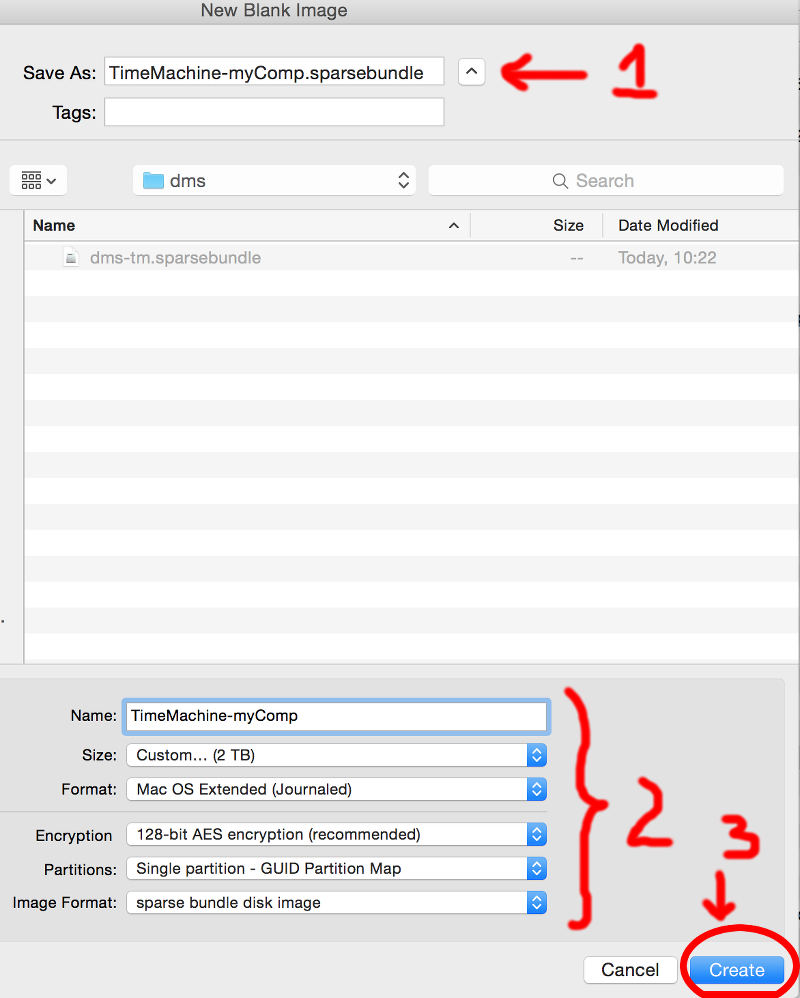
2. Open DISK UTILITY, and create a new BLANK DISK IMAGE
3. Fill in ALL fields! – Save As: – filename of the file on network drive Name: – how the volume image will be mounted Size: Choose CUSTOM and size equal +10% of your backup source. Format: Mac OS Extended (Journaled) Encryption: (if necessary – makes sense for network) Partitions: Single partition – GUID Partition Map Image Format: sparse bundle disk image (will start small and grow to required size limited by Size as indicated above.
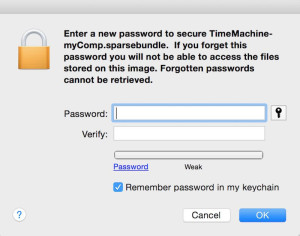
4. If encryption was selected in previous step, create your password.
5. Enabling the new volume as a backup destination in TimeMachine
– The new disk should AUTOMOUNT – if not, double click on it
– Open Terminal and enter the following command :
1
sudo tmutil setdestination -a /Volumes/{mounted-disk-image}
Be sure to replace
1
{mounted-disk-image}
with the appropriate name for your new disk image. You will be prompted for your password, this is normal.
!!! WARNING – IF YOU DO NOT USE THE”-a” flag after “setdestination” – running the above will clear your previous list of BACKUP drives (eg. local backups) – and they will need to be relinked the next time you reconnect them.
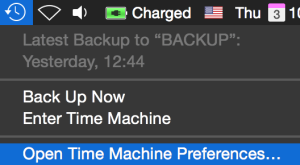
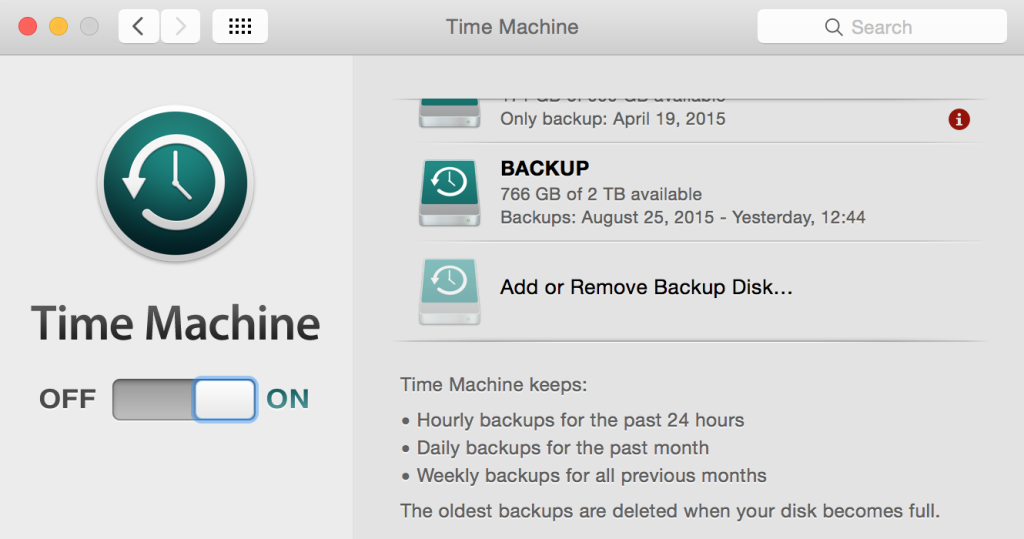
6. Open TimeMachine Preferences, and select the new Volume for Backups!
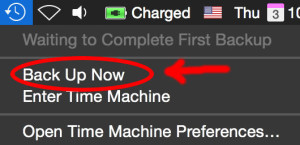
7. Start your backups!
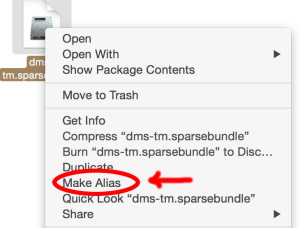
8. Optional – to make it easy to mount the volume, make an alias of the BACKUP.sparsebunle file you created with disk utility and copy it to your Desktop or other convenient location.
Right-click on the file, and select “MAKE ALIAS“. A new file with the same name, and an .alias extension is your tiny link file which you can use to easily mount your disk.


")


")

 from ISO image")

